Add and manage project team members
Summary:
Add a colleague to a project, select their role, and review team access.
Before you start:
You need permission to manage project membership. Confirm the colleague’s name, email address, target project, and required role.
Add a team member
- Open User Admin in the sidebar, or select Active Users in your project. The administration page is headed Admin User Management.
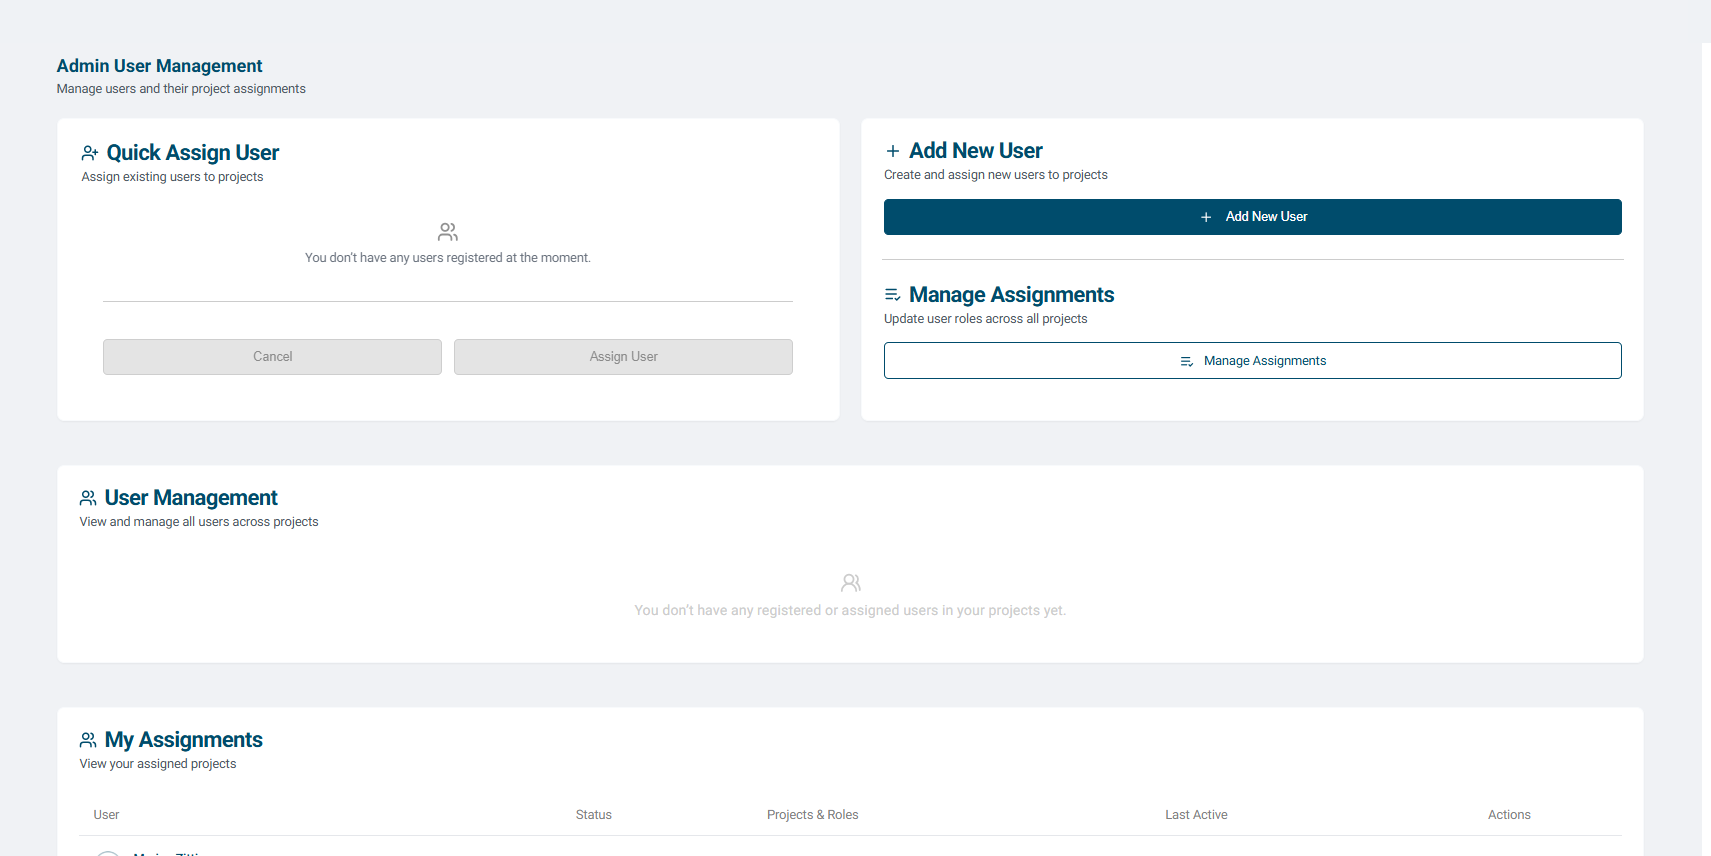
- Review existing users before adding another user.
- Select Add New User.
- Enter Name, Surname, and Email Address.
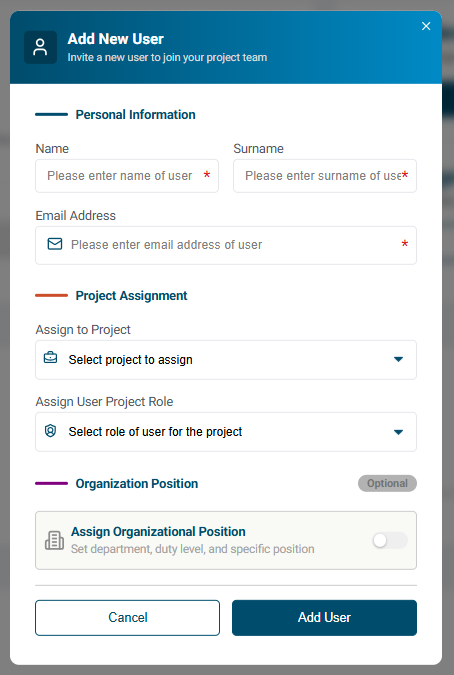
- Choose the project in Assign to Project.
- Select Admin, Editor, or User in Assign User Project Role. See the role guide if you are unsure which access is needed.
- If relevant, enable Assign Organizational Position and enter department, duty level, and position details.
- Check the person, project, and role, then select Add User.
- Review the confirmation or membership list and follow any account-access instructions shown.
Review team access
Use Manage Assignments to review project membership and roles. Update a role or remove project access through the available membership controls when responsibilities change. Give each person the lowest level of access needed for their work.
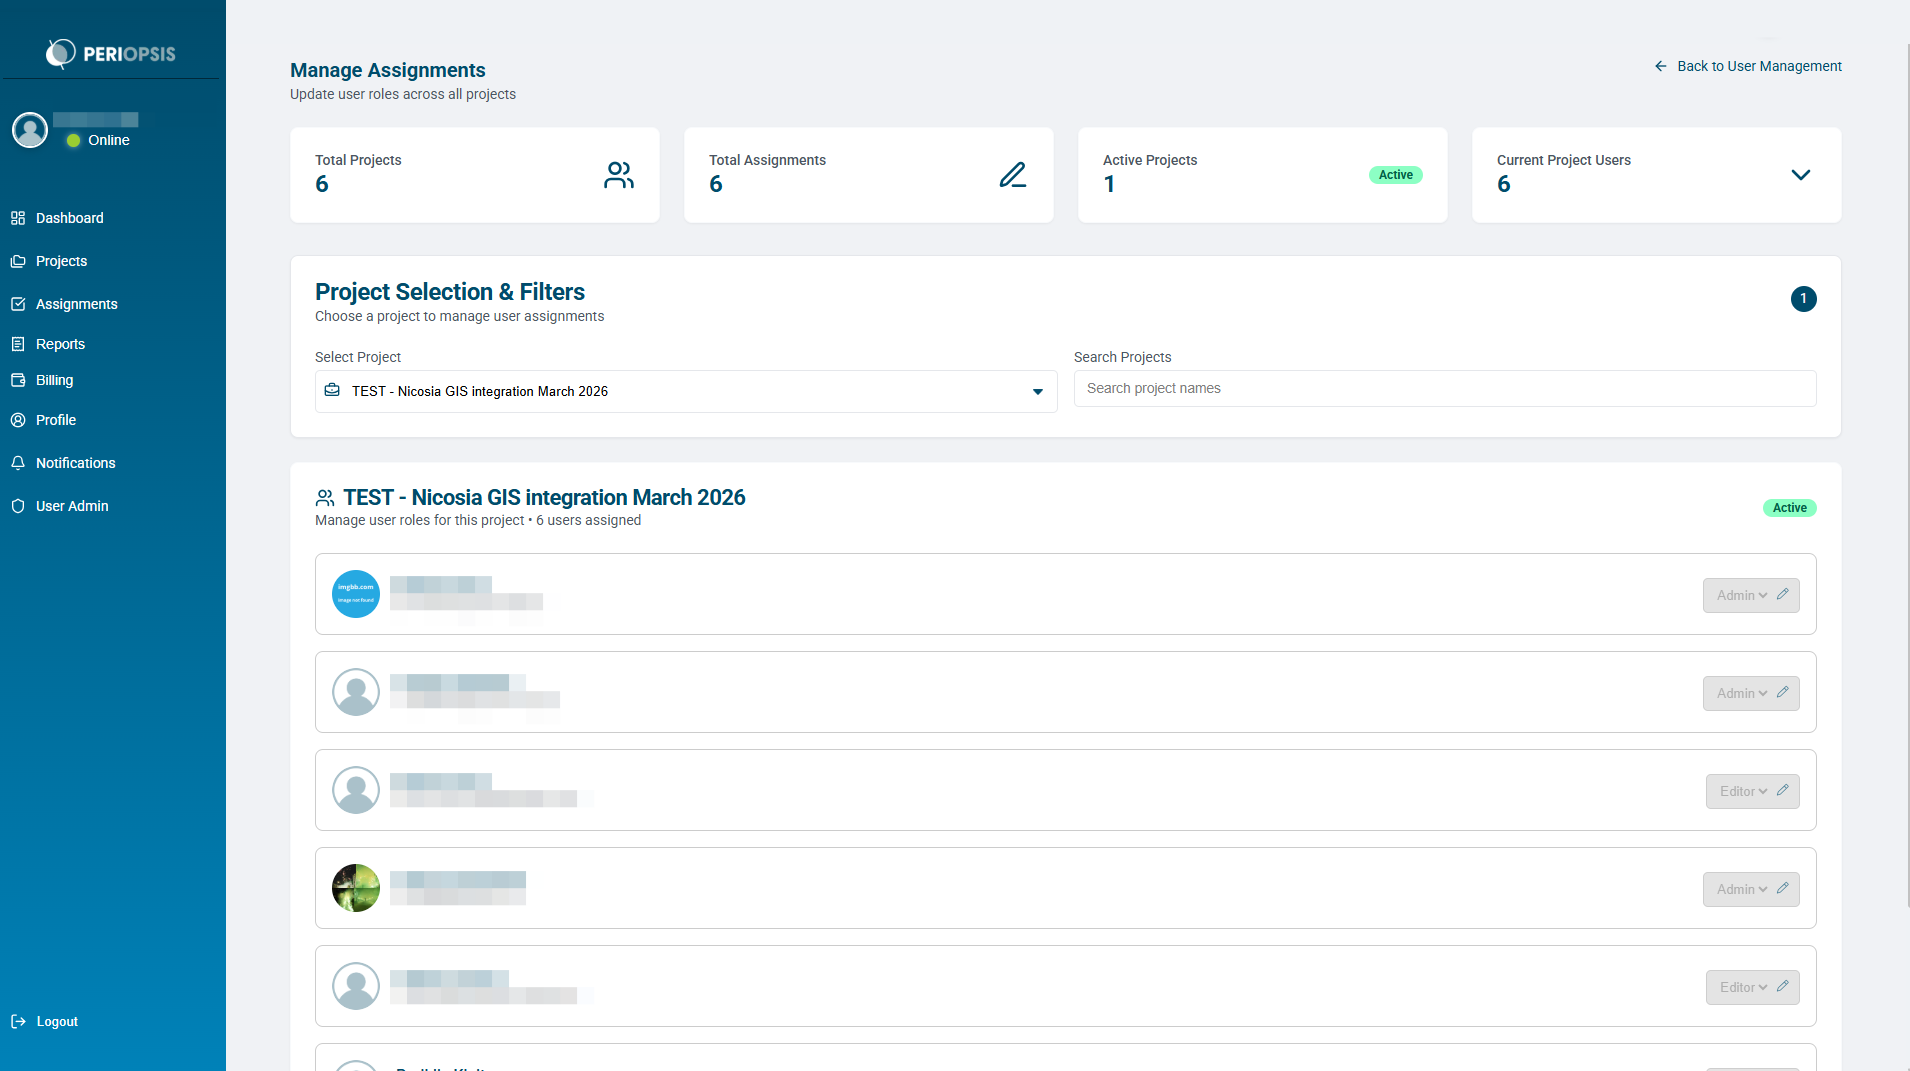
If the person already exists in your account’s user list, use Quick Assign User instead of creating a duplicate. Project membership provides access; assigning an incident gives the person a specific task.